Home » Invoices Module
Invoices Module
- Access Invoices Module
- Filters
- Invoice List
- Payment Options
- Create and Edit Invoices
- Setting Up a New Invoice
Navigation:
On the Büro CRM dashboard, locate the sidebar menu on the left.
Invoices Section:
Click on the “Invoices” tab which is indicated with an icon that looks like a bill document

Invoice Management:
Once in the “Invoices” section, you can view and manage all your invoices.
At the top of the invoices list, there are tabs for “Pending,” “Open,” “Overdue,” and “Paid” which allow you to filter invoices based on their payment status.
Search Bar:
You can search for invoices using the search bar.
Sort By:
Invoices can be sorted by date, latest, oldest, or alphabetically (A-Z).
ID:
Each invoice has a unique identifier.
Customer:
The name of the invoiced customer.
Invoice Title:
The title or description of the invoice.
Total Price:
The total amount of the invoice.
Email Status:
Indicates how many emails have been sent regarding the invoice.
Paid Status:
Displays the amount paid and the payment status.
Notes and Edit:
Icons for additional notes and editing of the invoice.
Invoice Details:
Displays the invoice ID, contract ID, offer ID, the title of the invoice, worker name, email status, creation date, and any notes attached.
Includes the total amount, paid amount, and unpaid amount.

Invoice Status and Actions:
Options to change the payment method and the status (Pending, Paid, Overdue), and actions like edit, mail, or delete.
Recurring Invoice:
With our latest feature, you can effortlessly set up automatic billing cycles for your customers. Say goodbye to manual invoicing and hello to seamless transactions. Enjoy greater convenience and reliability as payments are processed automatically according to your chosen schedule. Simplify your billing process and focus on what matters most growing your business.
Total Amount:
Our automated billing cycles empower you to define the precise amount to be charged in each cycle. Whether it’s a fixed fee or variable charges, you have the flexibility to set the amount that best aligns with your business model and customer preferences. Take control of your billing process and ensure accuracy and transparency with every transaction.
Payment Method:
The method by which the customer will pay. Enhance the convenience of your billing process and provide flexibility that meets the needs of your valued customers.
Date of Next Invoice:
Our system provides clarity on when the next invoice will be generated, ensuring you and your customers are always informed with transparent scheduling, you can anticipate upcoming billing cycles and plan accordingly.
Frequency:
The invoice will be generated, with options like weekly, every fourteen days, or monthly.

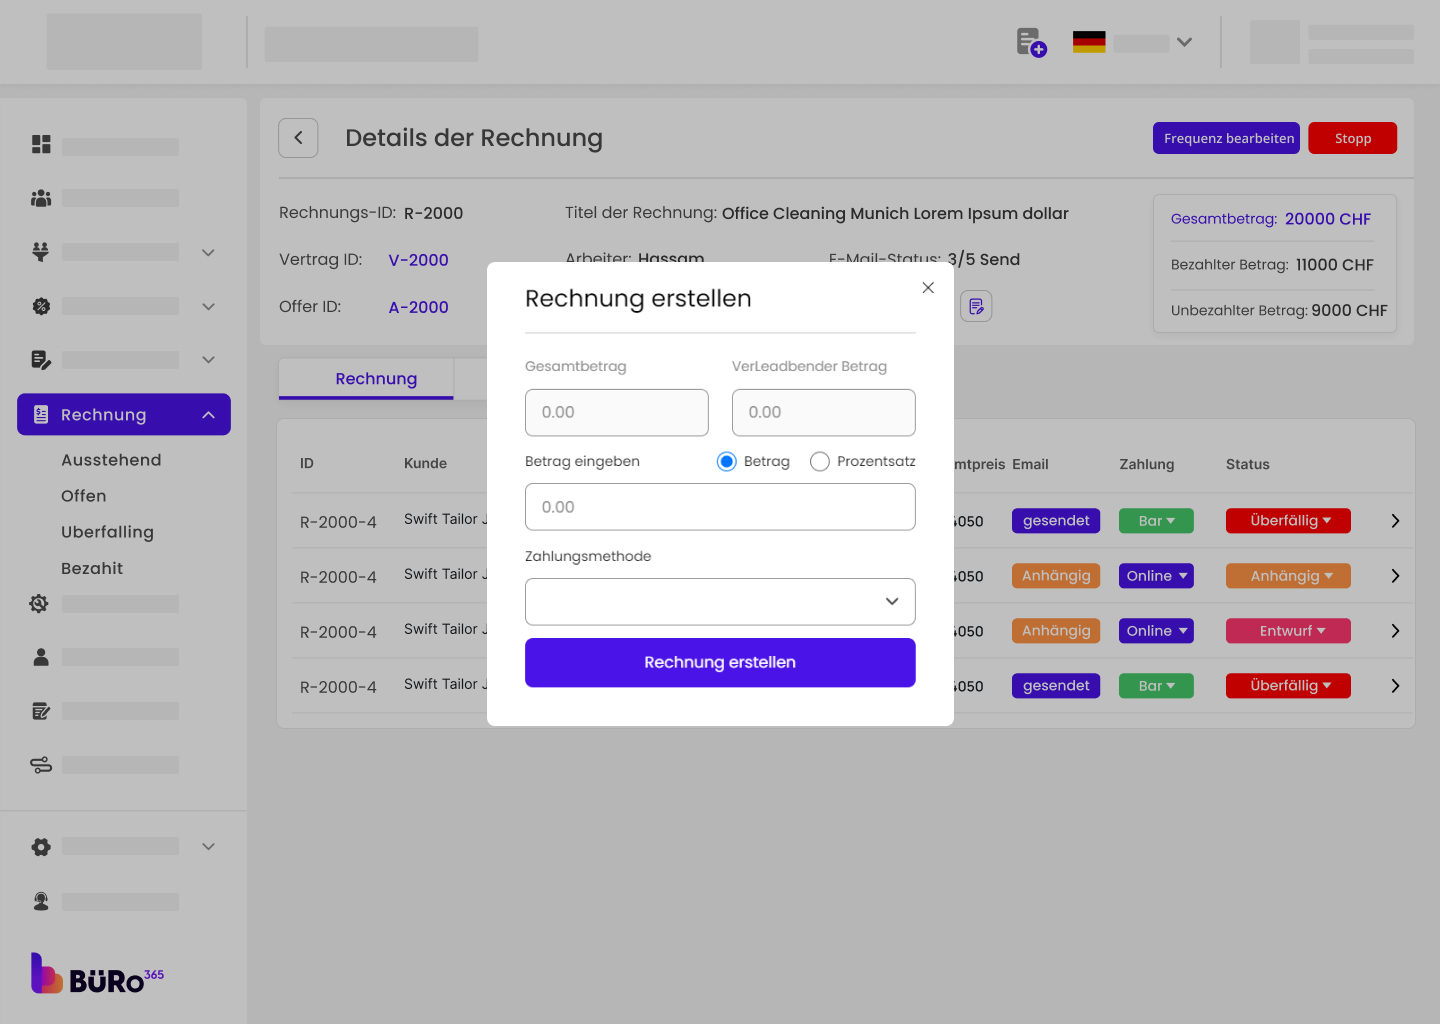
Generate a New Invoice Manually:
Enter the Total Amount:
In the “Total Amount” field, input the total charge for the services provided. Ensure this amount is accurate.
Select the Payment Method:
- Click on the “Payment Method” dropdown menu.
- Choose the appropriate payment method (e.g., Online, Check, Cash) that the customer will use.
Set the Invoice Date:
- Click on the calendar icon in the “Date of next invoice” field.
- Select the date when the invoice is being created. This is typically the current date unless you are backdating the invoice.
Choose the Frequency:
- For recurring invoices, click on the “Frequency” dropdown.
- invoice will be generated (e.g., weekly, monthly, quarterly).
Create the Invoice:
Once all the information is verified and correct, click the “Create Recurring Invoice.

Edit Invoice:
To modify the details of an existing invoice.

In the “Invoice Details” form:
Select Customer: Choose between a new customer or an existing one.
Invoice Details: Fill in the customer’s name, gender, email, phone number, etc.
- Enter the detailed address information where the service will be provided, including street name and number, postal code, city, and country.
- You can add multiple addresses if the offer covers different locations by clicking ‘Add New Address’.
Address details:
Proceed to the ‘Address Details’ section:
- Input the street number in the ‘Street No’ field.
- Fill in the postcode and city in the ‘Post Code + City’ field.
- Choose the country from the ‘Country’ dropdown menu.
Service Details:
Specify the content of the invoice, offer title, start and end dates, and time.
Additional Details: Additional service or contract-related information.
Confirmation: Once all details are provided, confirm to create a new invoice.

