Home » Lead Module
Lead Module
Access “Lead” module:
Click on the “Leads” section on the left-hand side menu. This section is typically used to manage potential clients who have shown interest in your services.

1. Understanding the Leads List:
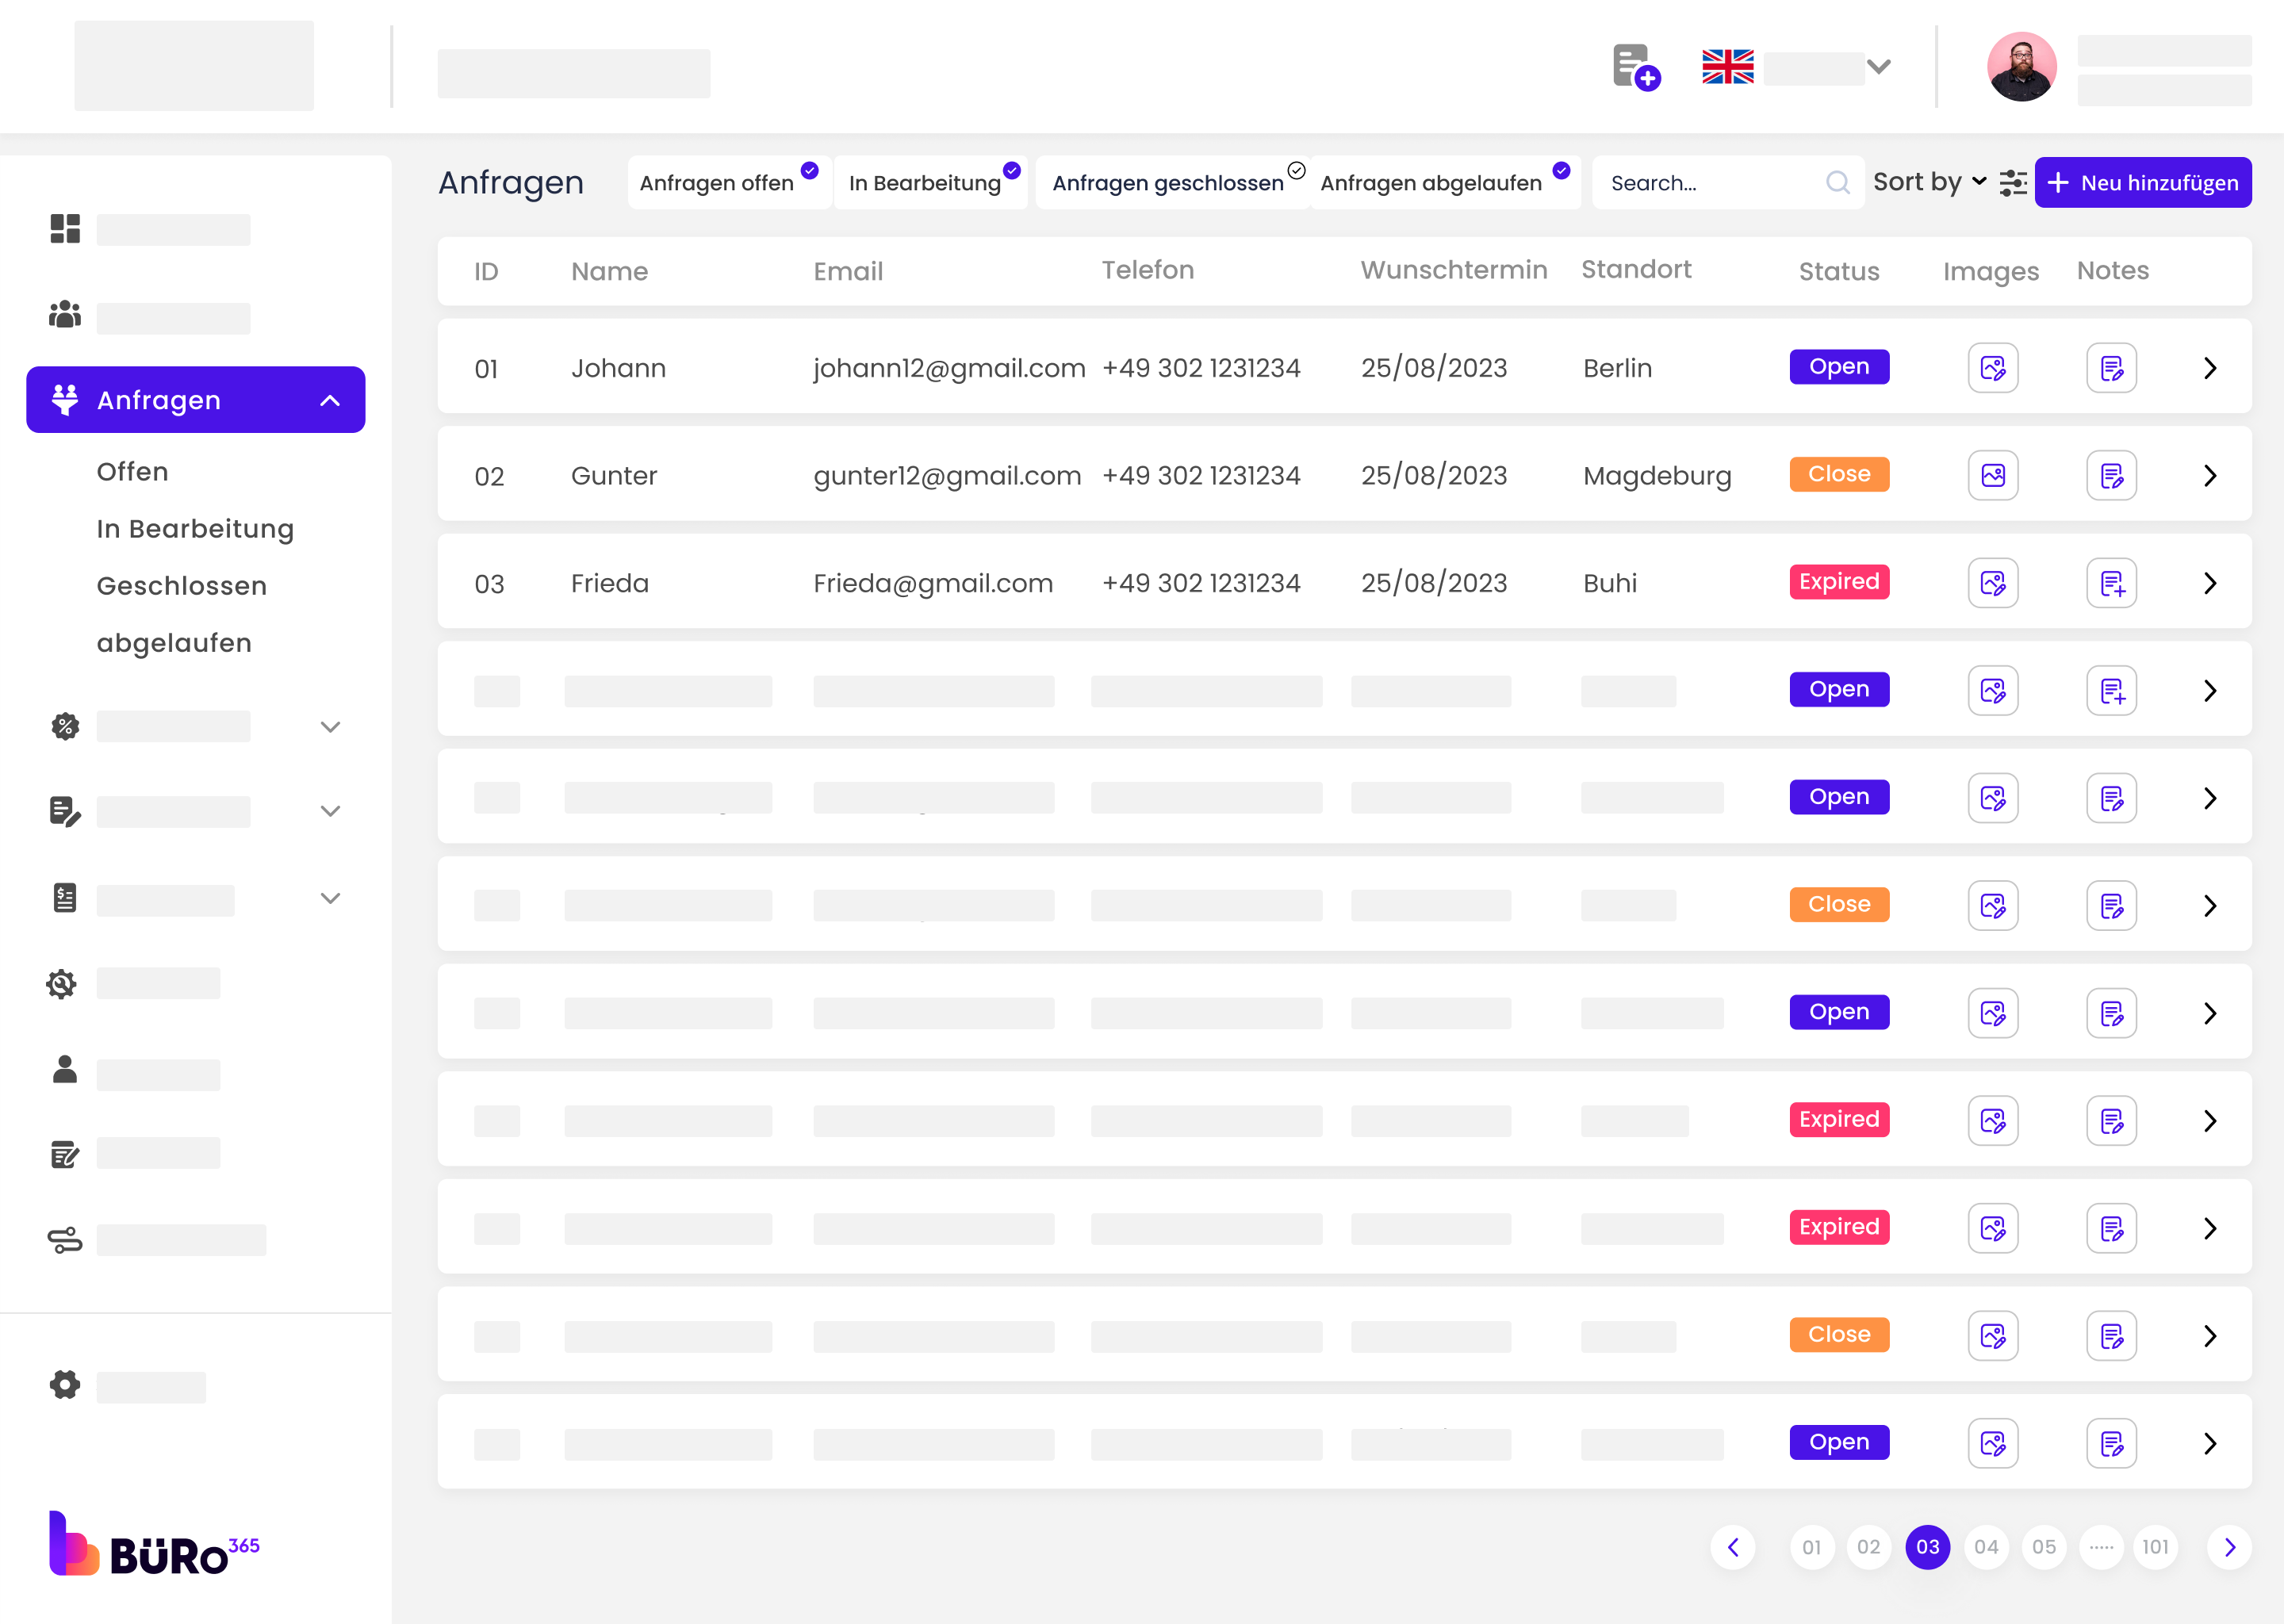
The main panel displays a list of leads with several columns such as ID, Name, Email, Phone, Desired Date, Location, Status, and options to view Images, Notes, and Edit. Each lead is assigned a unique ID for identification and tracking.
2. Lead Status:
Notice the Status column which indicates the current stage of the lead. The possible status are “Open,” “InProcess,” “Close,” and “Expired.”
- Open Leads: These are new or currently active leads.
- InProcess Leads: These leads are being worked on, likely with ongoing communication or negotiation.
- Close Leads: These leads have been resolved, either by becoming customers or by deciding not to proceed.
- Expire Leads: These are leads that have not been followed up on within the expected timeframe and are now considered inactive.
Managing Lead Notes:
- Click on the notes icon to add or view notes for a lead.
- This can include additional information, follow-up reminders, or any other relevant annotations.
3. Lead Details:
Click on a lead to view more detailed information, which includes the service they are interested in, any previous interactions, and the lead’s specific requirements.

4. Interacting with Leads:
Use the “Images” icon to view or upload images relevant to the lead. This might include pictures of properties for example moving services, contracts, or other documents.
- The “Notes” feature allows you to read or leave notes about the lead, which is useful for maintaining a history of interactions and important information.
- The “Edit” option lets you update the lead’s information as necessary.
To add a new lead in the “Leads” module for the Büro 365, you would typically follow a process that guides you through entering various details about the lead.
Step 1: Accessing the Leads Module
- Login into your Büro365 account.
- Navigate to the “Leads” section on the sidebar.
Step 2: Starting the Lead Creation Process
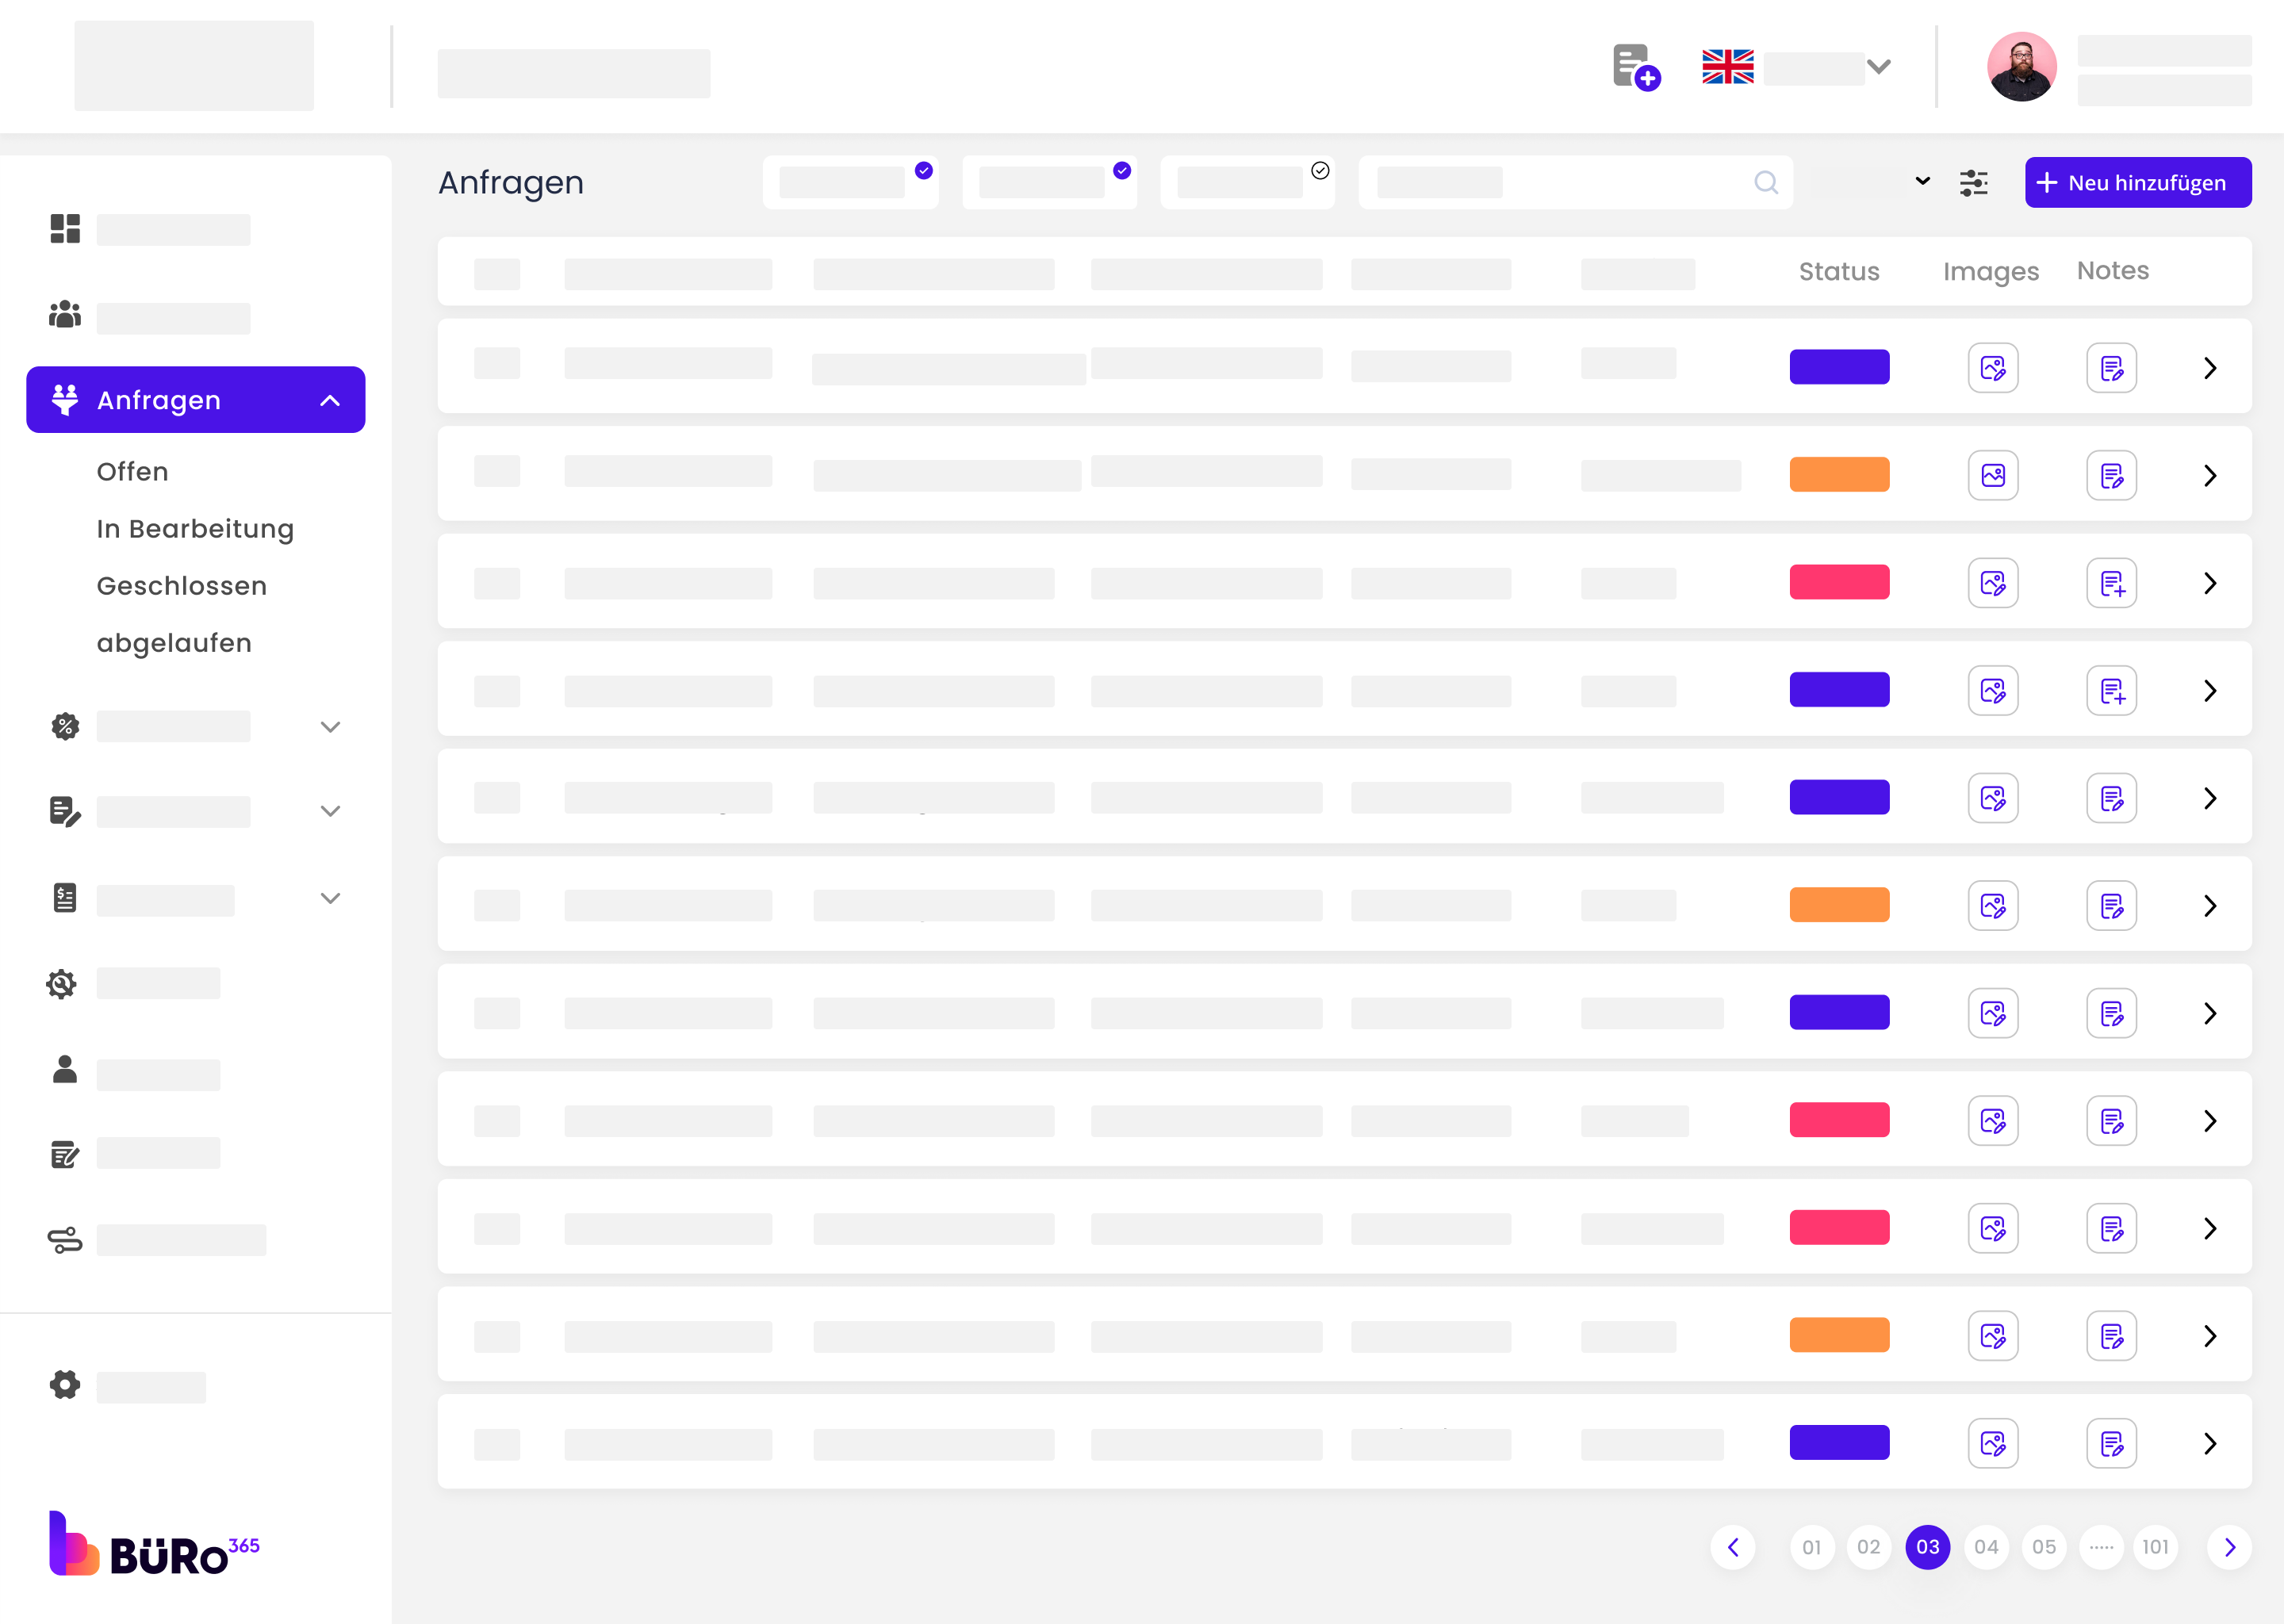
1. Click on the “+ Add New” button, found at the top right of the leads list.
There are four steps to add a new lead.
Follow these steps:
1) Customer details 2) Address details 3) Service details 4) Additional details.
Step 1: Customer Details
- Choose the ‘Leads’ option from the main menu on the left side of the screen.
- Click ‘Add New Lead’ at the top of the Leads page.
- Start by filling in the ‘Customer Details’:
- Select the type of customer: ‘New Customer’ or ‘Existing Customer’.
- Enter the full name of the customer in the ‘Full Name’ field.
- Provide the mobile number in the ‘Mobile Number’ field.

Step 2: Address Details
1. Proceed to the ‘Address Details’ section:
- Input the street number in the ‘Street No’ field.
- Fill in the postcode and city in the ‘Post Code + City’ field.
- If applicable, choose the country from the ‘Country’ dropdown menu.
Step 3: Service Details
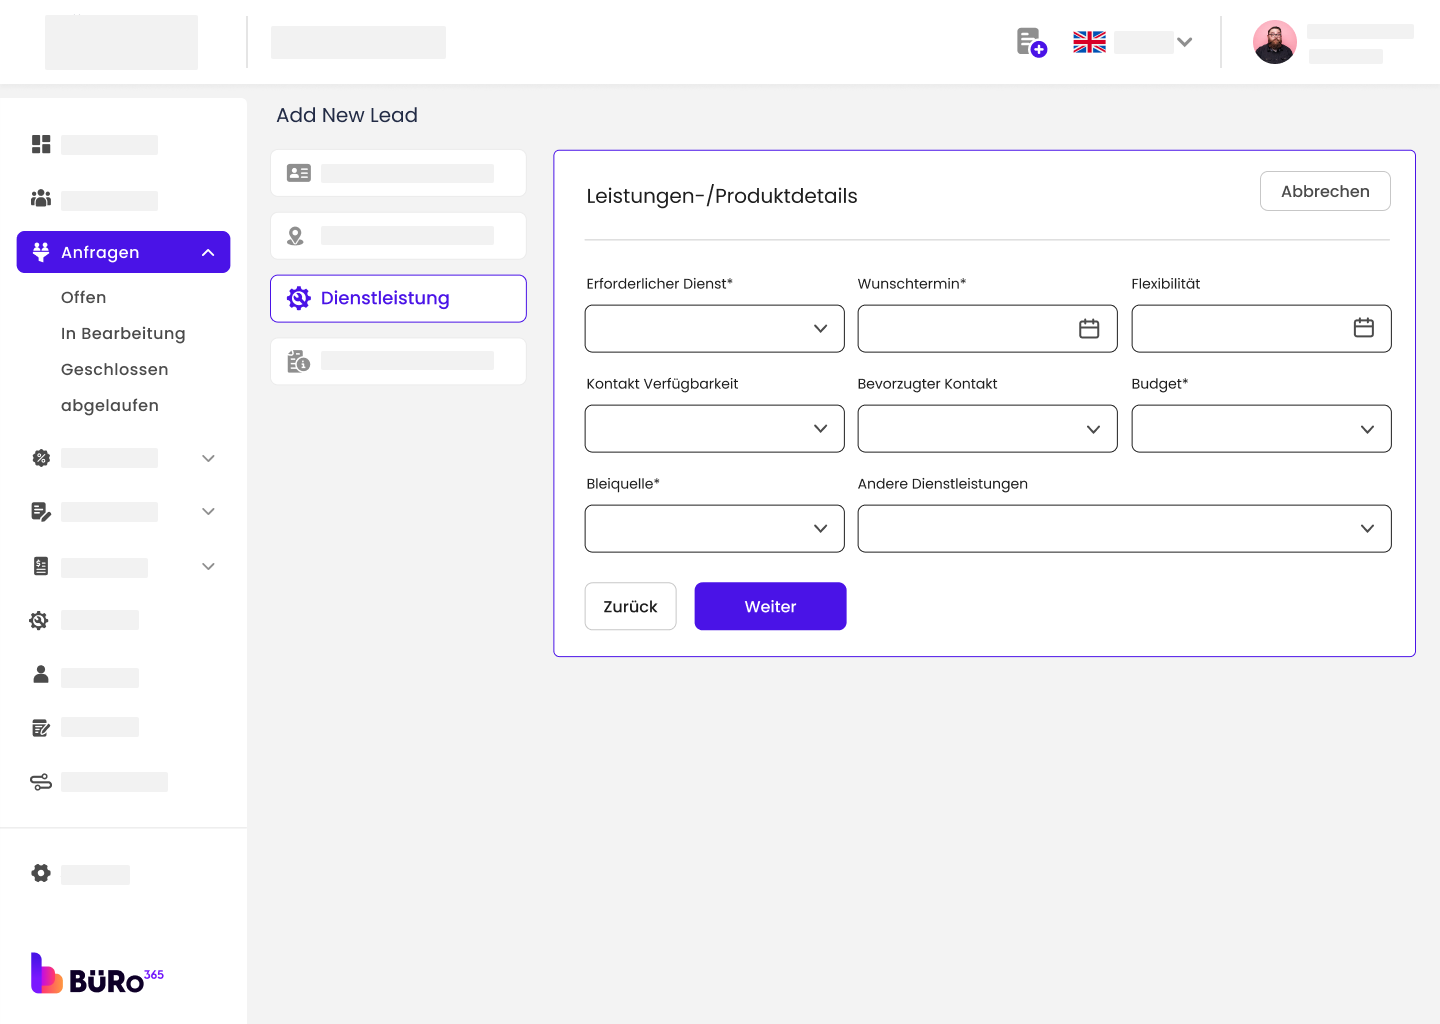
Click on the ‘Service Details’ tab to specify the services
Note:
- You can add services separately from the ‘Content’ module in the main menu.
- Include any specific service details required by the lead.
Step 4: Additional Details
Navigate to the ‘Additional Details’ tab
- This section might include additional information about the lead or the services they are interested in.
- Fill out any fields necessary to provide a comprehensive profile of the lead’s requirements.

Lead Confirmation:
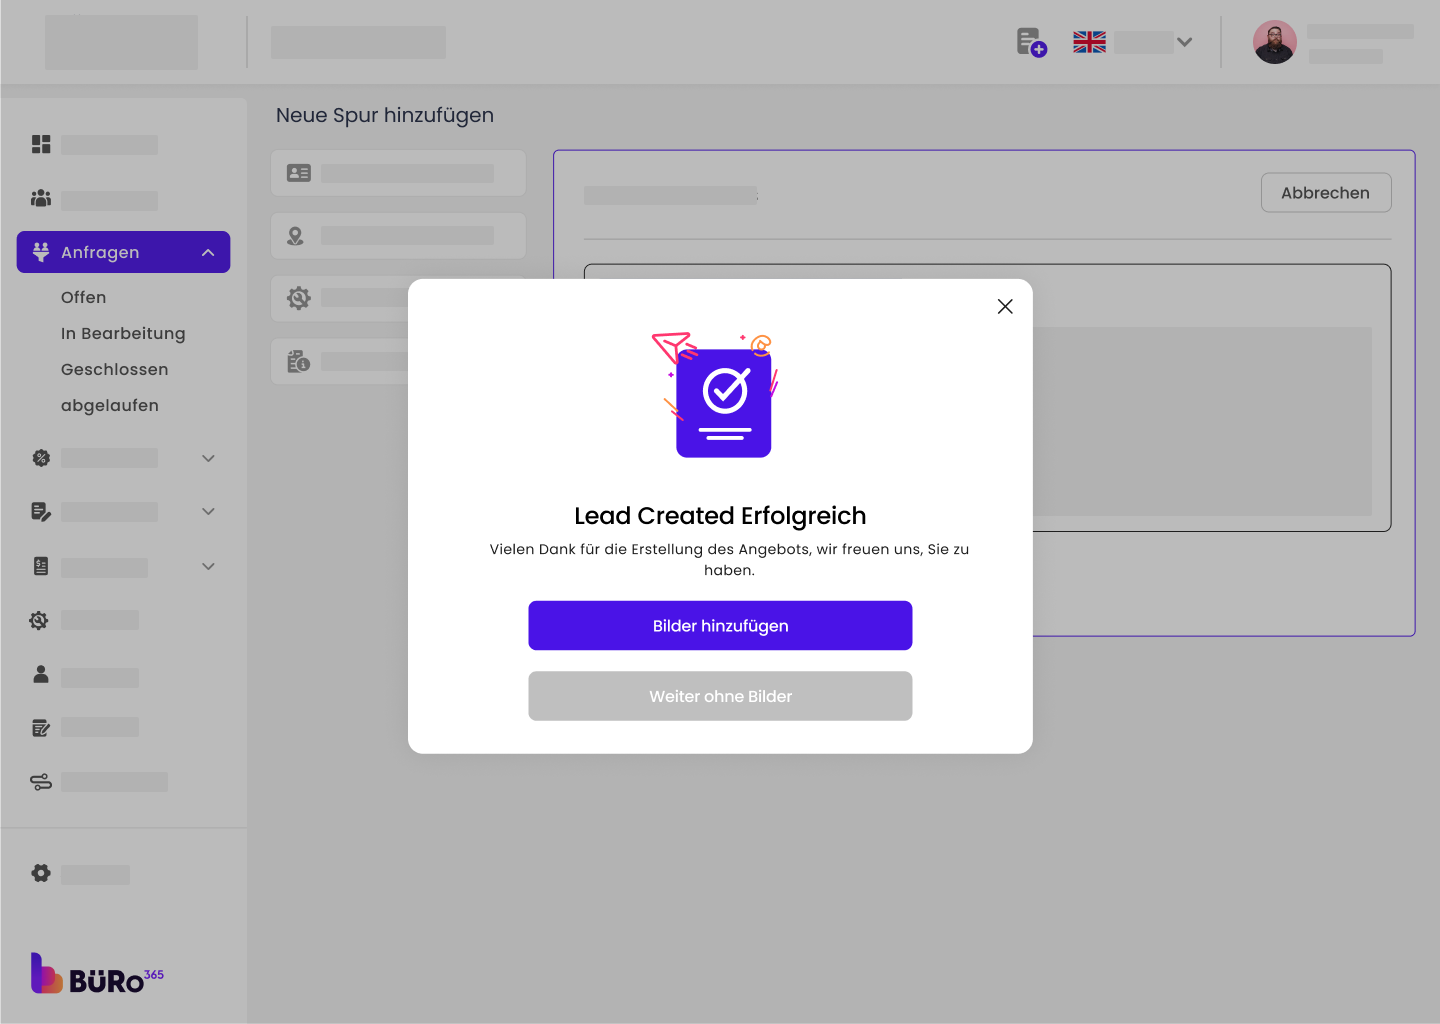
After you have entered all the necessary information, our system will process the data. You should see a confirmation screen similar to the one you provided, indicating that the lead has been successfully created.
Adding Images (Optional):
At this stage, you have the option to enhance the lead’s profile by adding images. This could be particularly useful if you need to attach visual references or documents related to the lead. Click the ‘Add Images’ button if you want to upload any images.
- If you click on ‘Add Images,’ you will be prompted to select image files from your device to upload to the lead’s profile.
- Ensure the images are clear, appropriately sized, and relevant to the lead.
- Once selected, confirm the upload and wait for the system to process the images.
Finalization:
If you decide not to add images to the lead profile at this moment, you can click on ‘Continue without Images.’ This will finalize the lead creation process. You can always add images to the lead profile at a later stage if necessary.
Additional Information:
- For services, remember that customers can also read details and understand how each service works by visiting the ‘Services’ section in the ‘Content’ module.
- The ‘Lead’ module allows customers to track their inquiry’s status and read details about the process.
Step 1: Access the Lead Details:
- Navigate to the ‘Leads’ section in your dashboard.
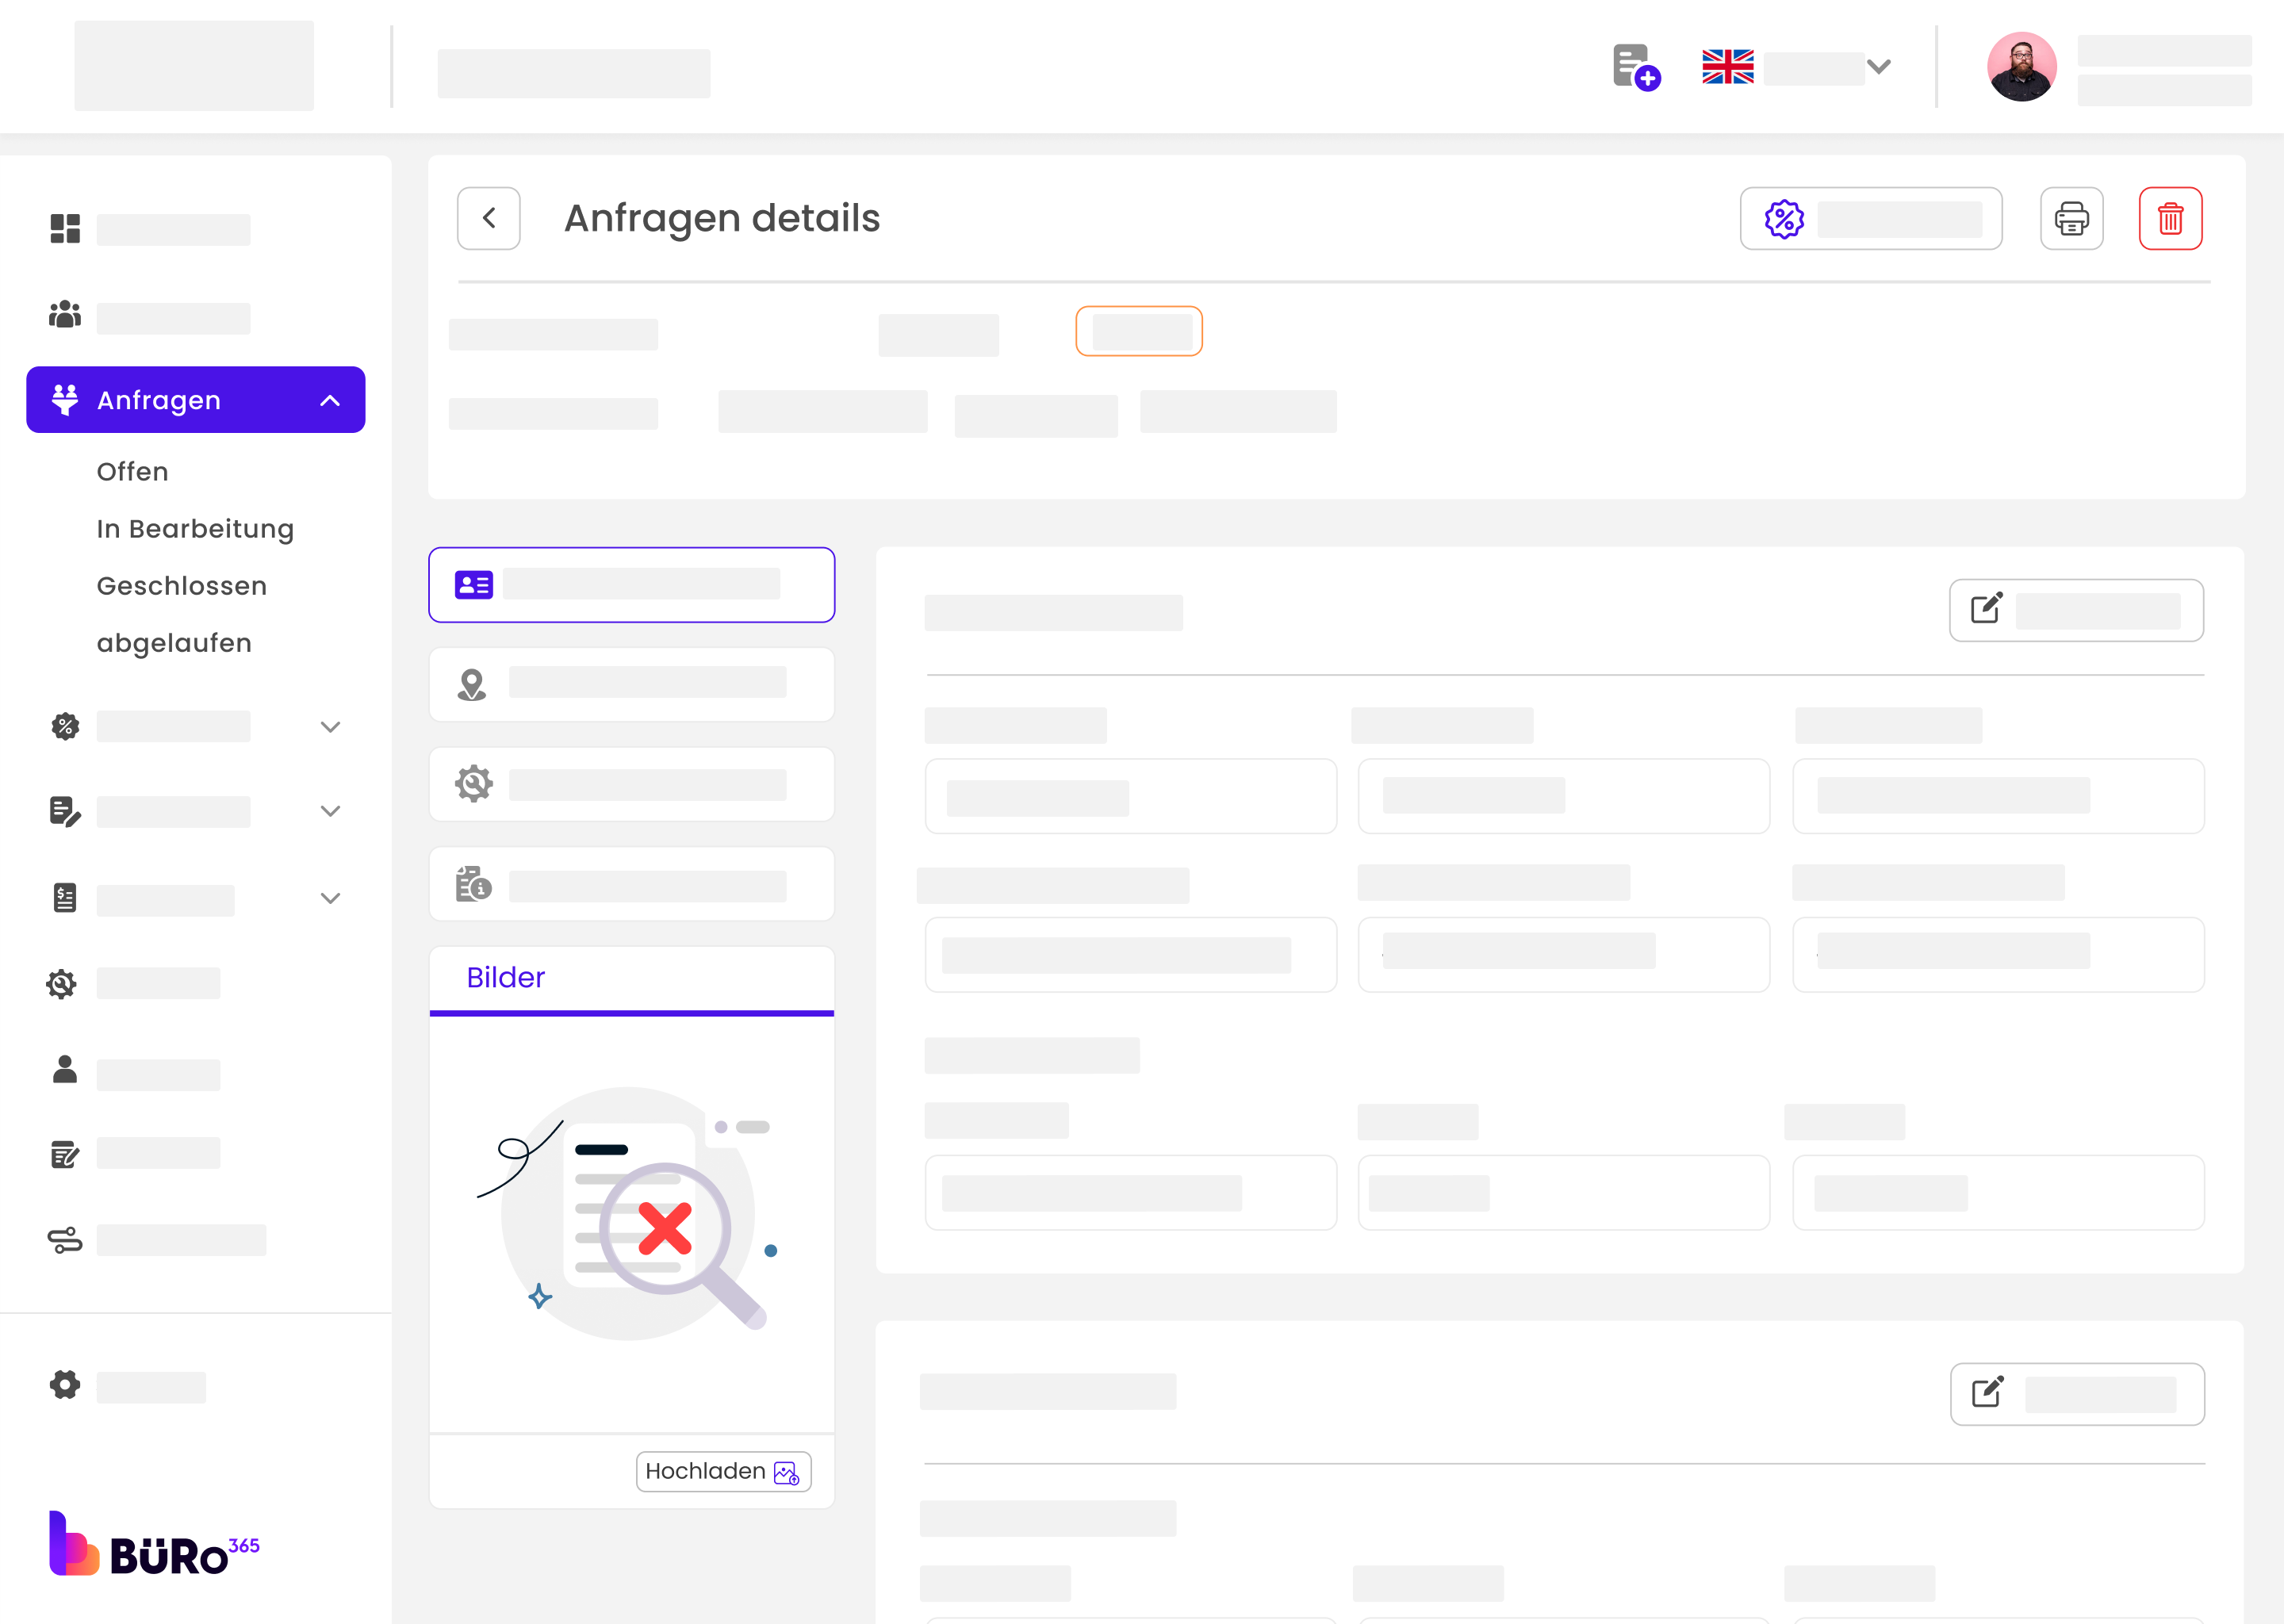
- Click on the specific lead you want to add images to, which will take you to the ‘Lead Details’ page.
Step 2: Locate the Image Upload Section:
- Scroll down to the ‘Images’ section within the lead details. You will see an ‘Upload’ button, indicating that you can add images to this lead.
Step 3: Adding Images:
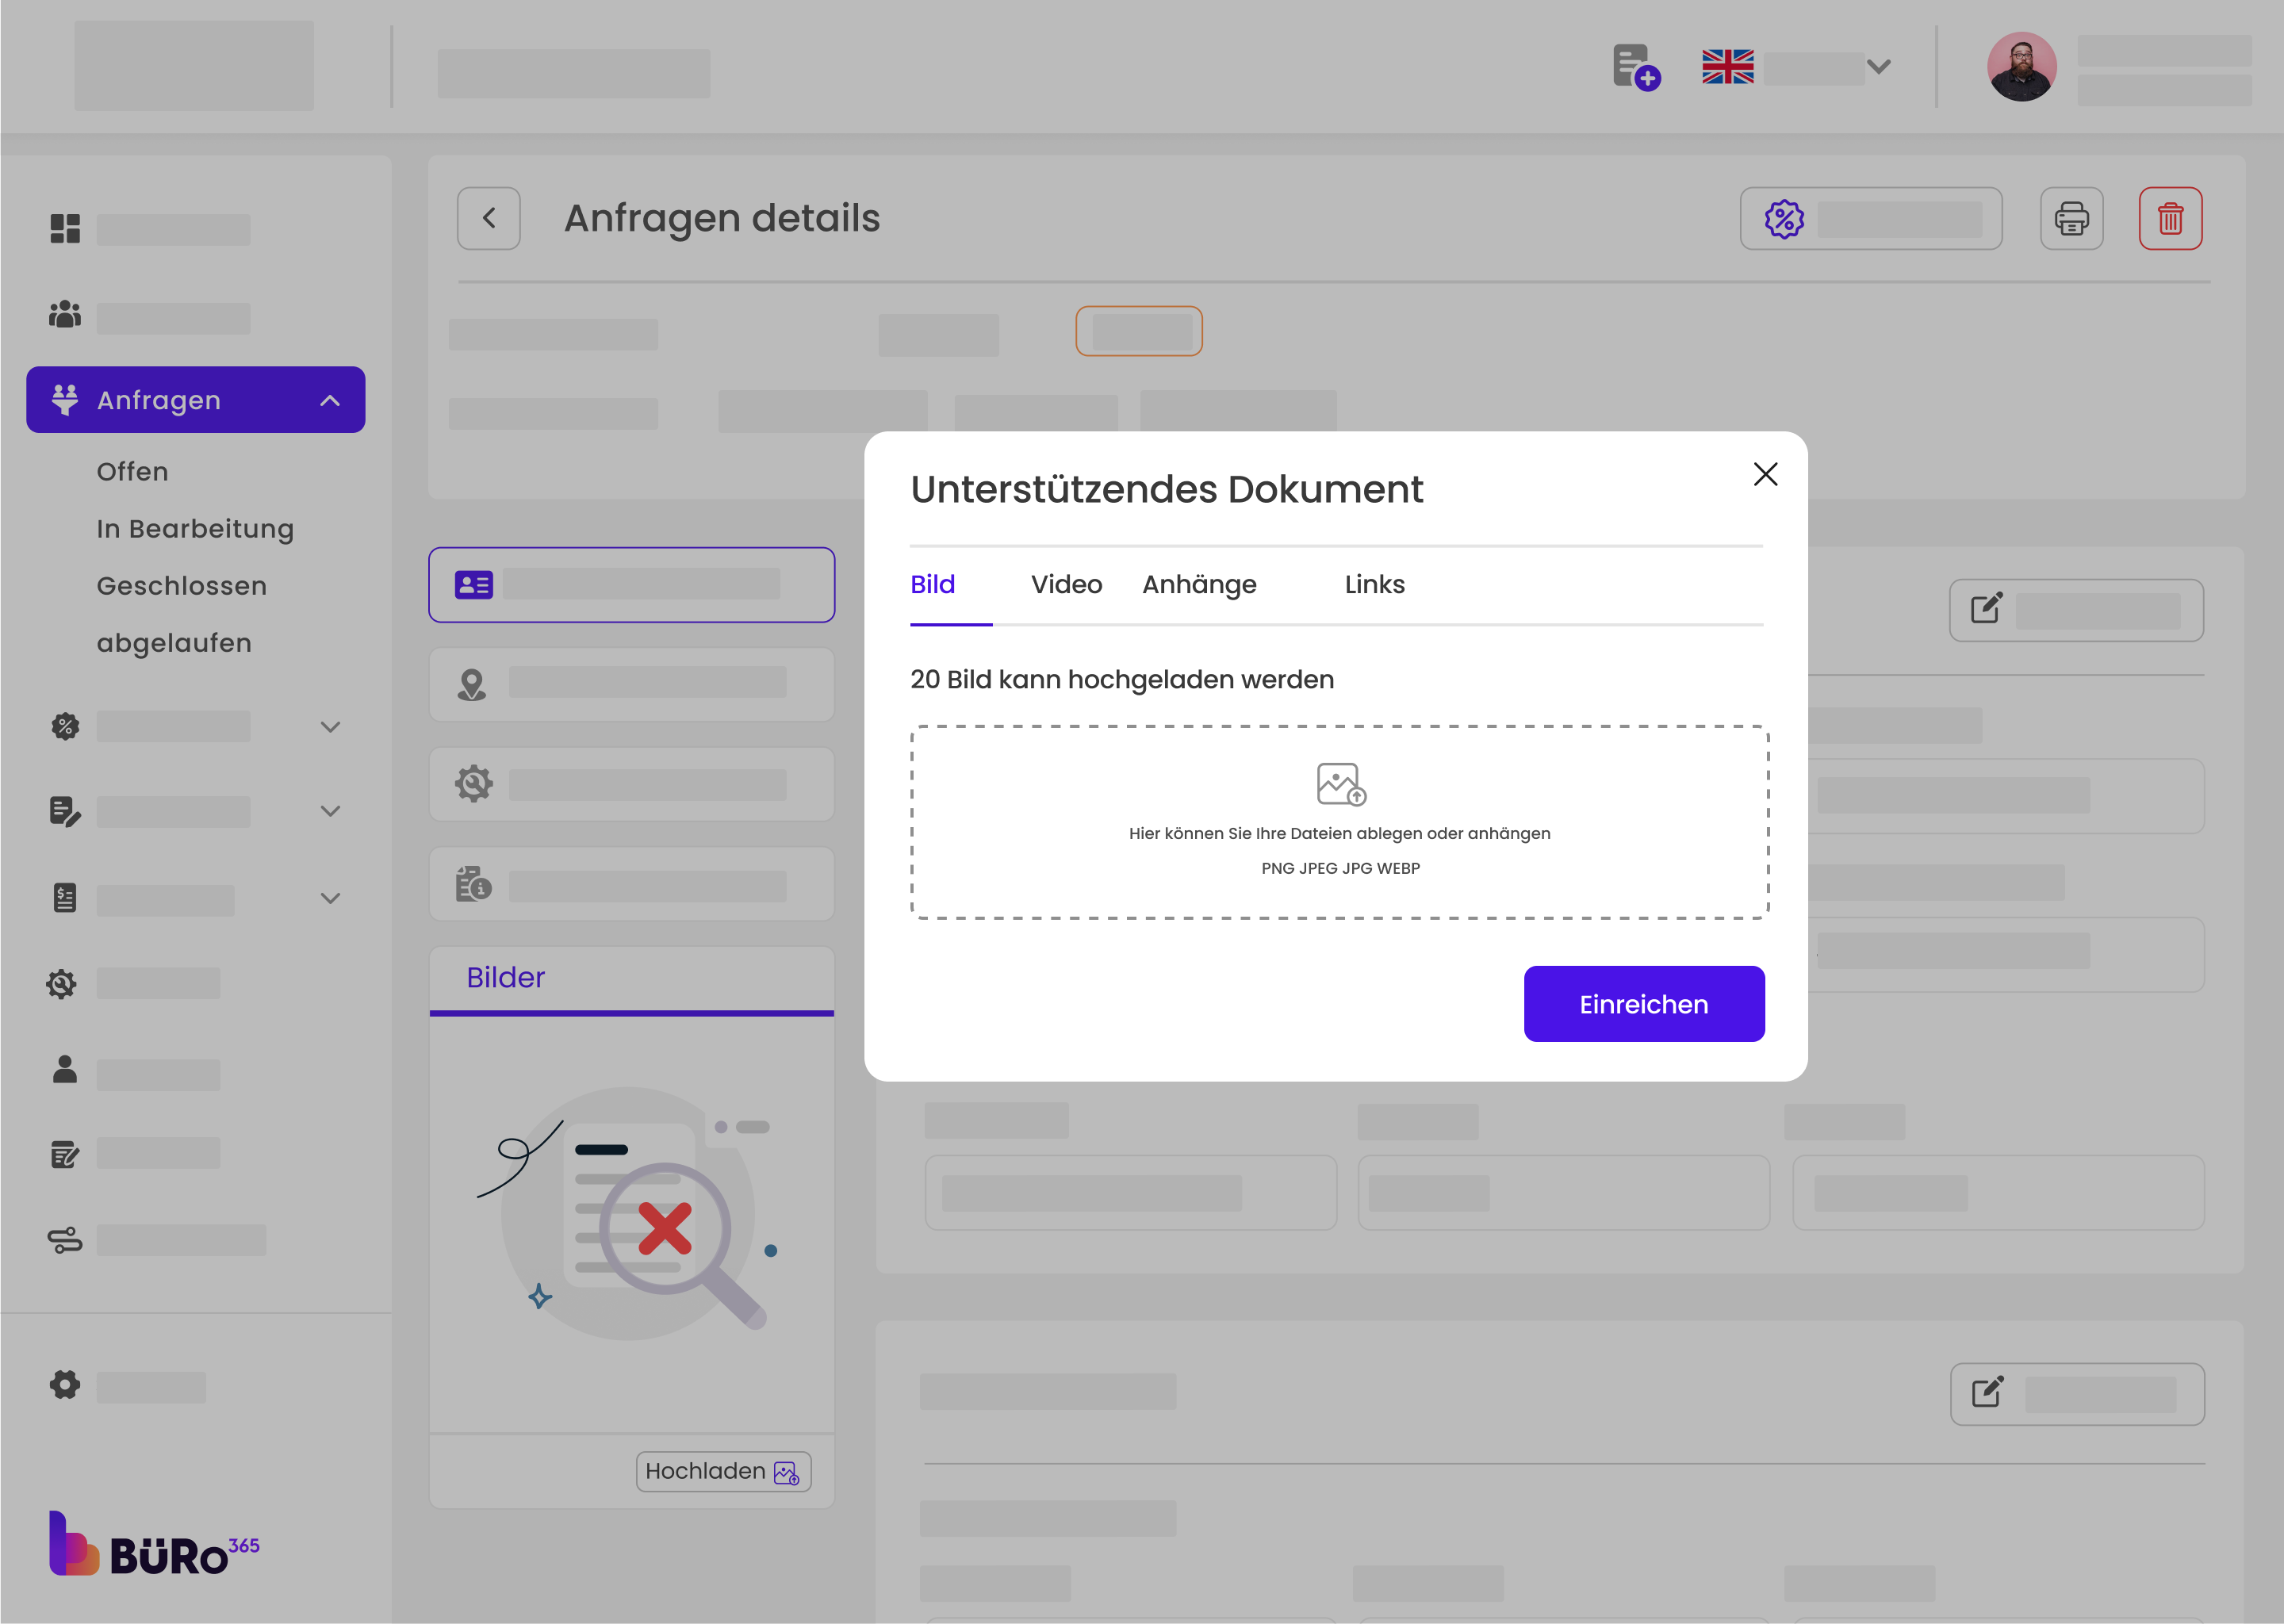
- Click on the ‘Upload’ button. A new window titled ‘Supporting Documents’ will pop up.
- Navigate to the ‘Images’ tab within this window.
Step 4: Understanding Image Upload Limits
- Please note that you can upload a maximum of 20 images for each lead.
- Ensure that each image does not exceed the maximum file size of 10MB.
- Accepted image formats are PNG, JPEG, JPG, and WEBP.
Step 5: Uploading Images
- Click on the ‘Add image’ area or drag and drop your files into this space.
- Once you have selected your images, you will see them appear in the upload window.
Step 6: Uploading videos
- Click on the ‘Add video’ area or drag and drop your files into this space.
- Once you have selected your video, you will see them appear in the upload window.
Step 7: Uploading Attachments
- Click on the ‘Add attachment’ area or drag and drop your files into this space.
- Once you have selected your attachments, you will see them appear in the upload window.
Step 8: Add links
- Click on the “Links” tab to add new web links to your document.
- In the text field provided, enter or paste the complete URL of the link you want to add. For example, “https://example.com”.
- After entering the URL, click on the “Add” button to include the link in your document. The link should now be listed under the text field.
- If you need to add additional links, repeat the previous steps for each new link.
- Once you’ve added all necessary links, click the “Submit” button to save the changes to your document. Your links will now be associated with the document and can be accessed by clicking on them.
Step 9: Viewing Uploaded Images
- Uploaded images will now be visible in the ‘Images’ section of the lead details.
- You can view these at any time to confirm the details or check on what has been provided.
1. Accessing the Share Feature
- Navigate to the Buro 365 Help Portal.
- Locate and select the lead module.
- Click on the “Share” button, typically represented by an icon that may look like a connected dot and arc, or a right-pointing arrow. This will open the “Share Images” dialog box.

2. Choosing the Share Method
- Within the “Share Images” dialog box, you will see different tabs such as Images, Video, Attachments, and Links.
- Click on the “Images” tab if it is not already selected.

3. Selecting Images for Sharing
- In the Images tab, you will see thumbnails of the images available for sharing.
- Click on the image(s) you wish to share. Selected images may be highlighted or marked with a check.
4. Sharing via WhatsApp
- Below the image thumbnails, find the section titled “Share on WhatsApp”.
- You will see a URL link below this title; this link is a shareable document viewer link for the selected image(s).
5. Copying the Link (If needed)
- If you wish to manually share the link, click the copy button to the right of the URL. This button typically looks like two overlapping squares or a clipboard.
6. Sharing the Image
Once you have selected the images and are ready to share, click the “Share” button at the bottom of the dialog box. This is usually a prominent button, possibly highlighted in a color like blue or purple for visibility.
Tips:
- Uploading clear and relevant images can help with the assessment and processing of the lead.
- Remember to respect privacy and confidentiality when uploading images that may contain sensitive information.
Troubleshooting:
If you encounter any issues while uploading images, such as errors or failed uploads, please contact support for assistance.
Contacting a Lead:
- You can use the email or phone information provided to contact the lead directly.
- It’s important to log any communication with the lead within the CRM to keep track of the progress and interactions.
Managing Leads:
- Sort leads using the “Sort By” dropdown menu to organize them by various parameters like name, date, or status.
- Use the search bar to quickly find specific leads by name, ID, or other criteria.
- The plus icon, “Add New,” allows you to manually enter a new lead into the system.
Begin by logging into the Buro 365. From the dashboard, click on the “Leads” section on the left-hand side menu. This will take you to a list of leads.

Selecting a Lead:
In the “Leads” section, find the lead you want to create an offer for. Click on the lead to open its details.
Creating an Offer:
Once you have opened the lead, look for a button or link labeled “Create Offer”. Click this to start the process of creating an offer for the selected lead.
Entering Offer Details:
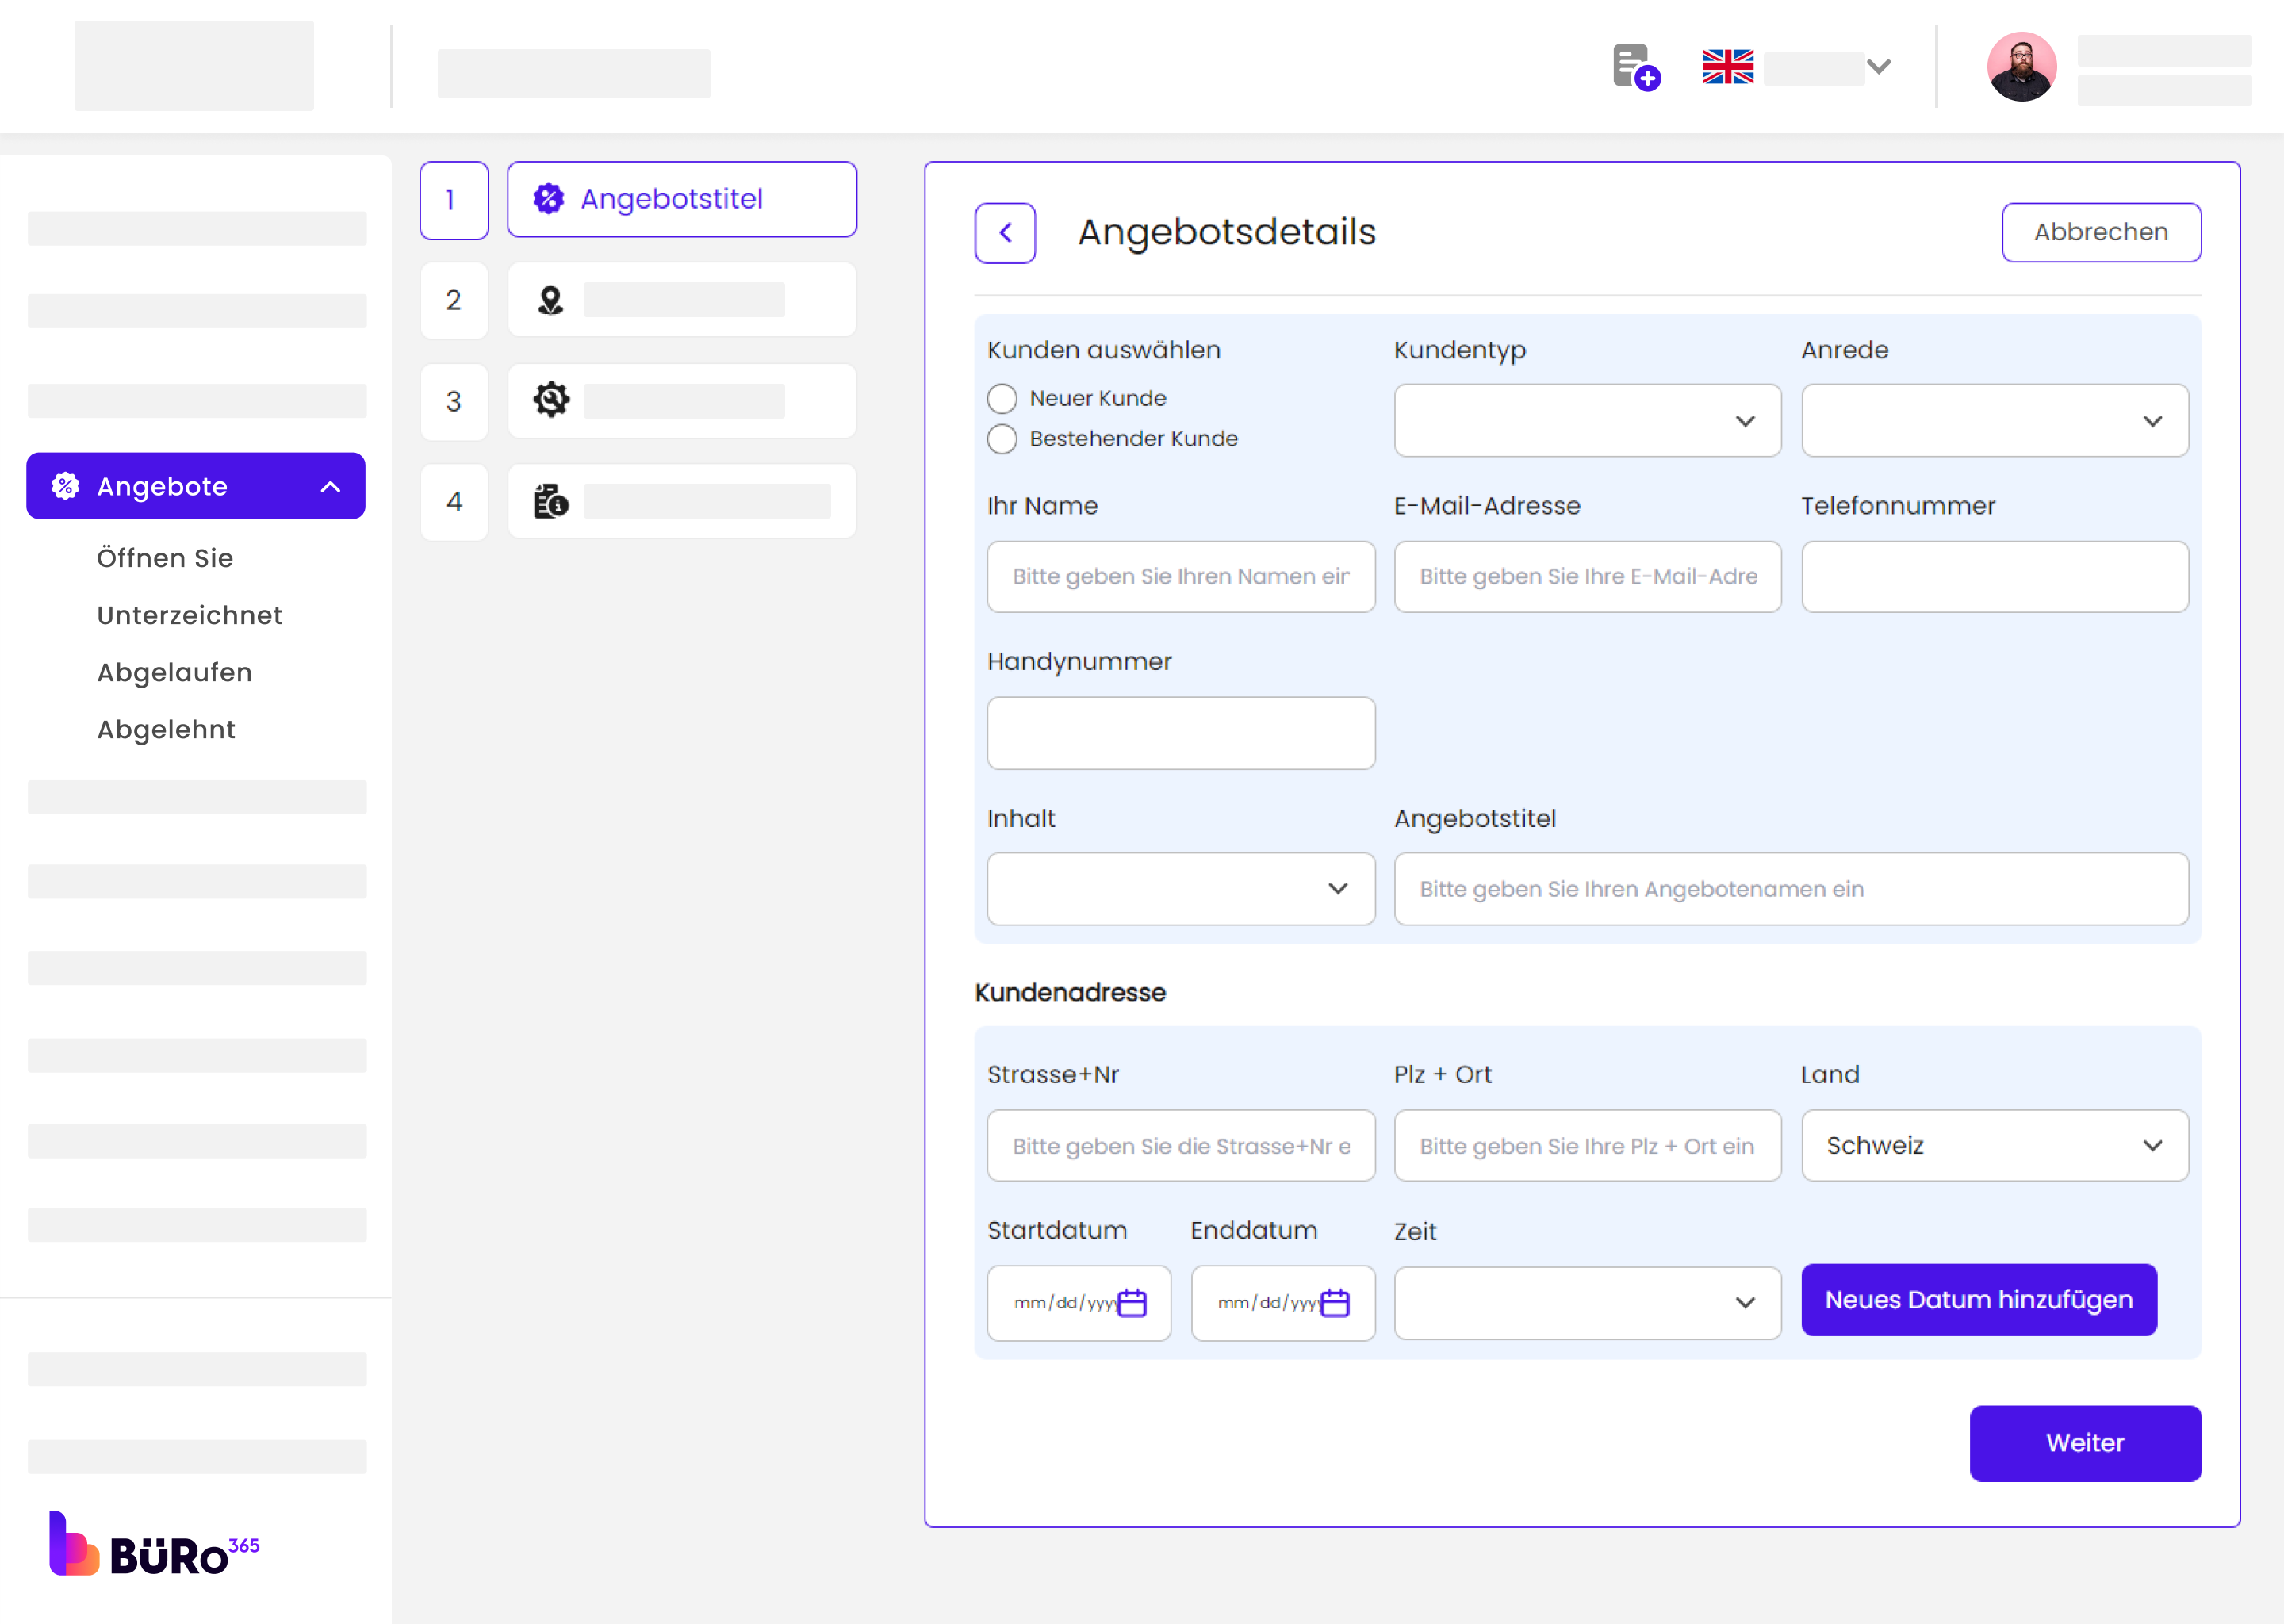
In the “Offer Details” form that appears, you will need to enter information step by step across different tabs. Start with the first section, “Offer Details”.
- Select a customer from the dropdown
- Fill in the details such as Offer Title, Customer Type, Email Address, Phone Number, Address, and the dates for the offer.

Entering Address Details:
Move to the “Address Details” tab. Enter the details of the address where the service will be provided.
You can add multiple addresses if the service requires it by clicking “Add New Address”.

Service Details:
Click on the “Service Details” tab. Here you specify the details of the service or product being offered. Input the service type, price, count, any discounts, and a description of the service.

Additional Details:
In the “Additional Details” tab, add any extra information that is relevant to the offer that was not covered in the previous sections.
You can choose from existing additional details or add new information in the provided text editor.

Confirmation:
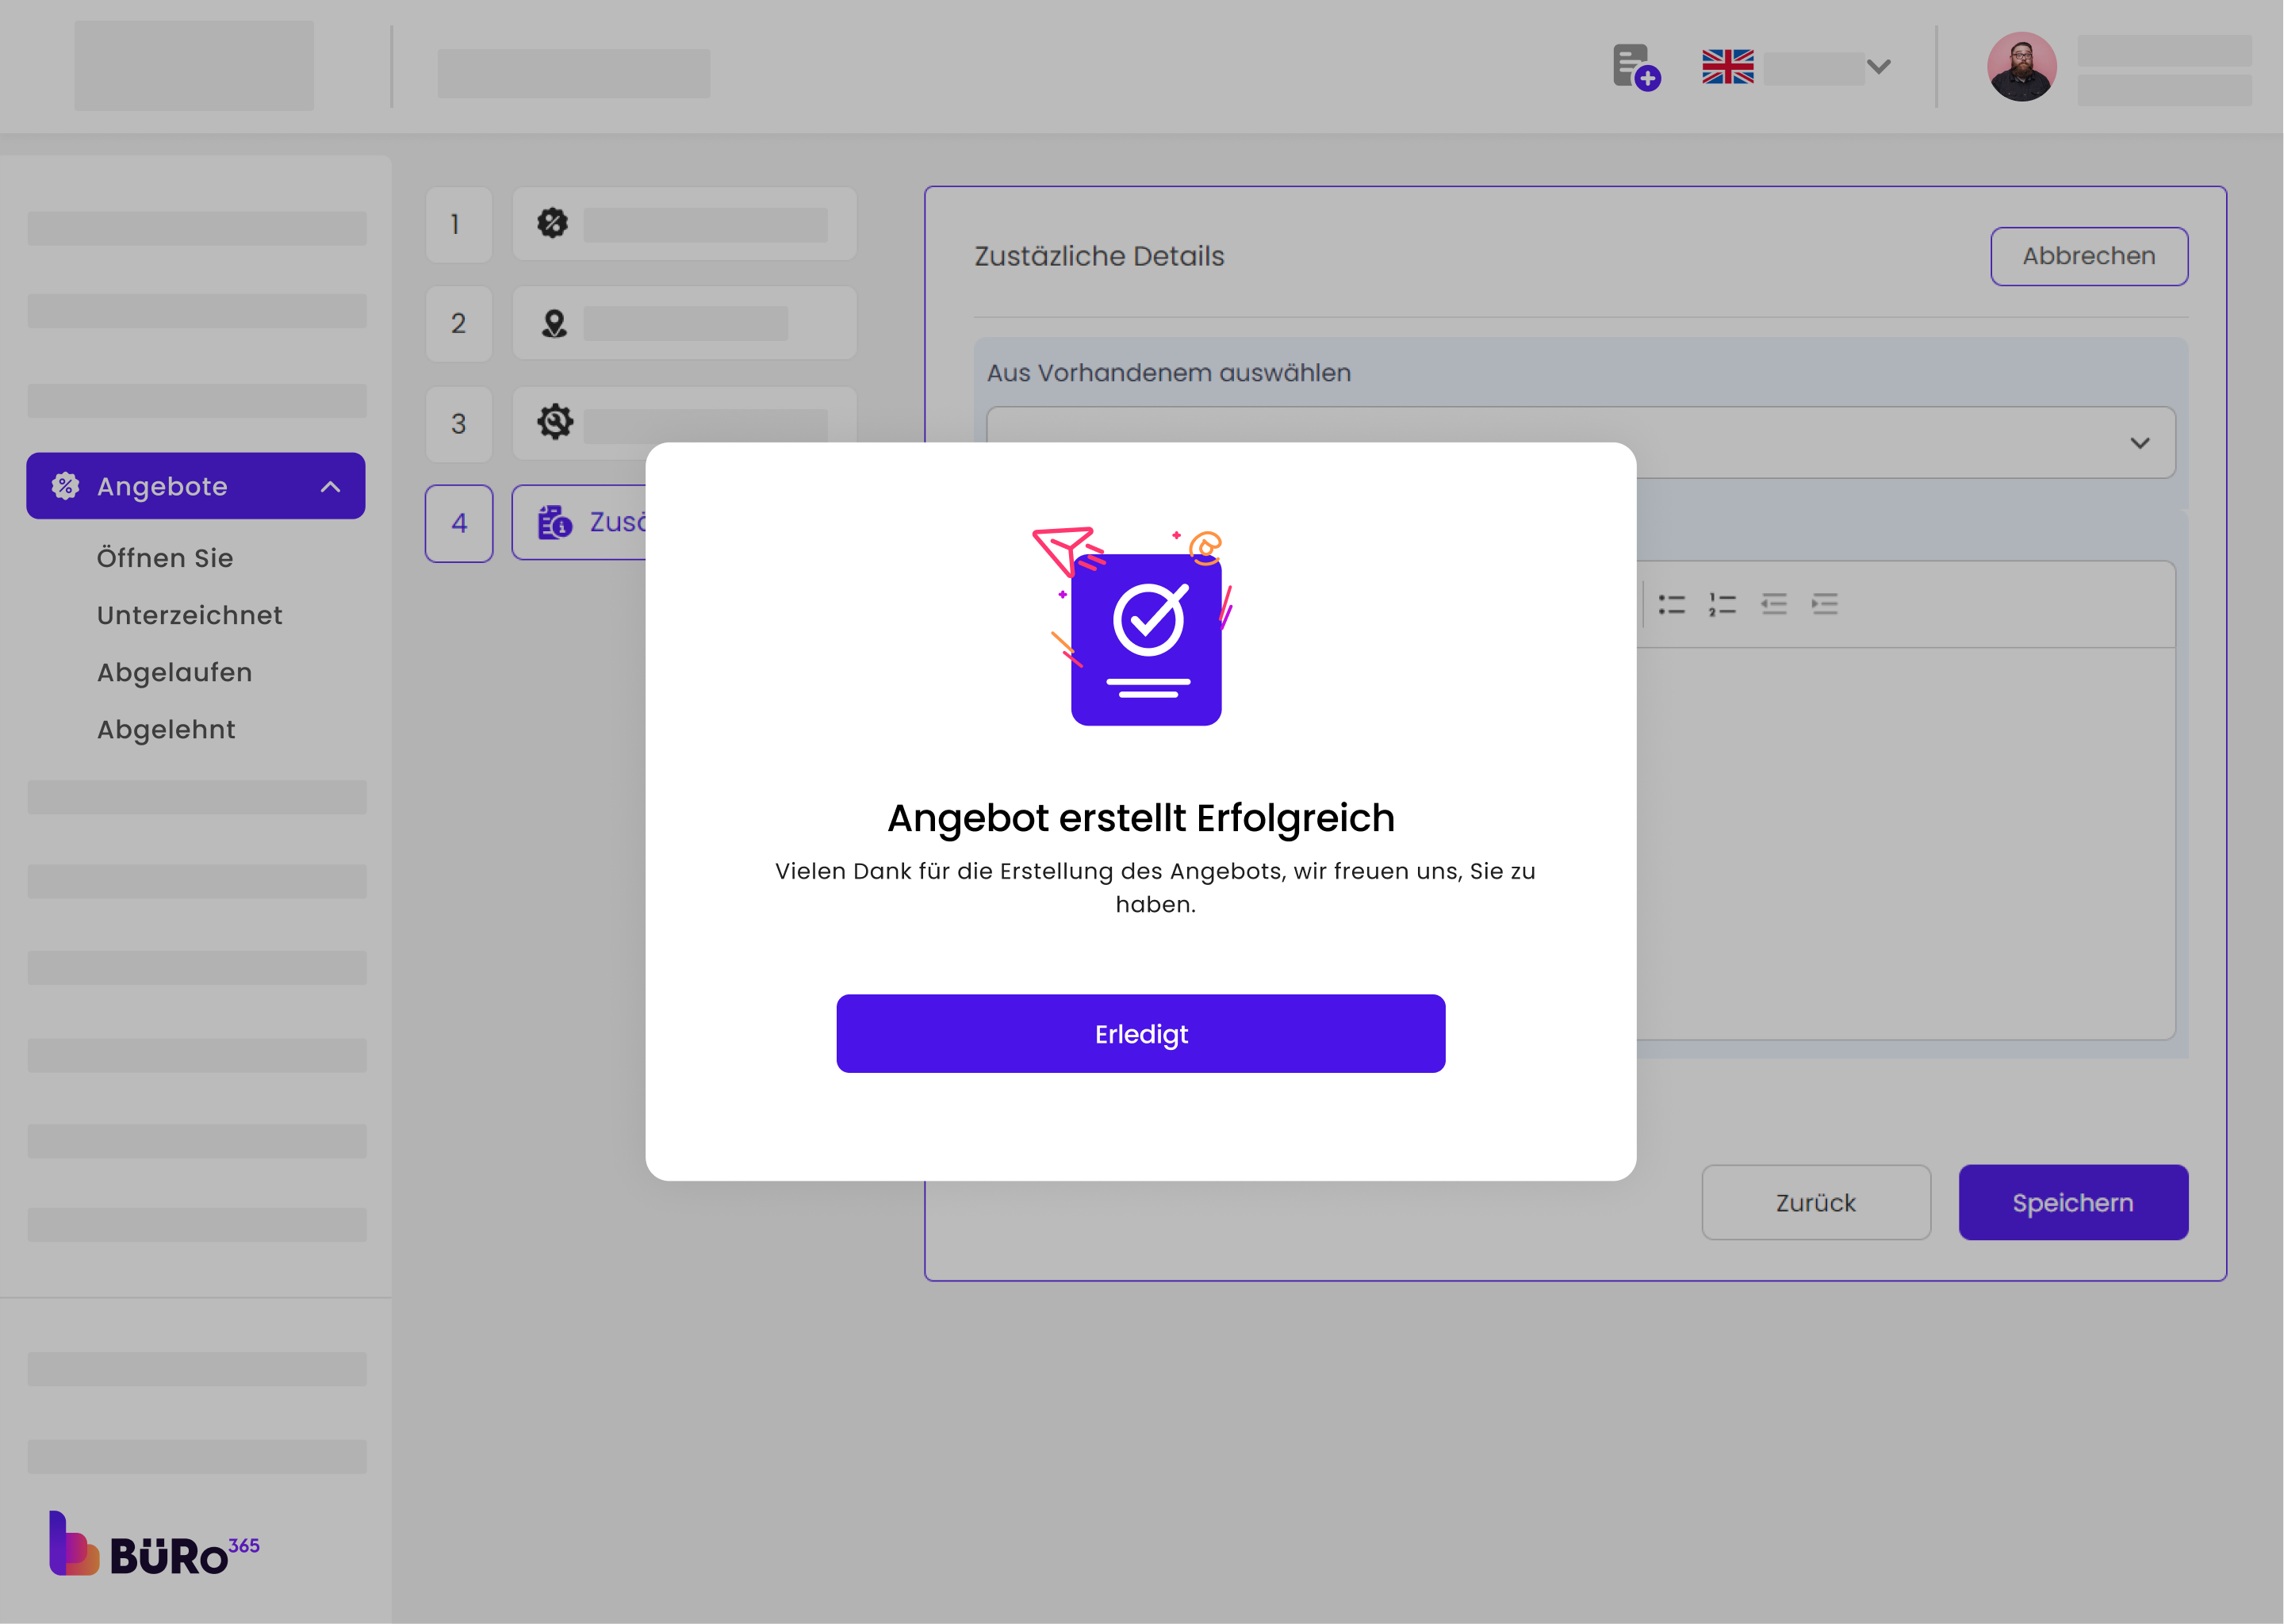
After you have entered all the necessary information, our system will process the data. You should see a confirmation screen similar to the one you provided, indicating that the lead has been successfully created
